Attach the rubber and feet back to the chassis, making the TT whole again.
I leave it to you to decide when it's best to attach the tonearm back to the TT - before or after the rubber is attached. When to attach the arm back to the TT can differ from arm-to-arm that you use with the TT. For SME arms, I recommend attaching it back after the chassis is put back together. Those using the stock tonearms may find its best to put the arm back before the rubber is put on - I leave it to your best judgement to decide. Your experience may differ.
Remove the long black bolts from the BBP (or BBP+Bearing unit). Now attach the Bearing to BBP if they were purchased seperately. The bearing will be attached to the BBP if they both were purchased together. Either way, make sure the black bolts are removed.
Before placing the circuitry back into place, run the long wire clip that attaches to the top of the PCB as it was before you removed it, so that the wire runs underneath the circuitry.
Now place the circuitry back into the chassis and solder the DC leads if necessary. Note - this will be a great time to relocate the negative DC cable to the true earth - screw it at the lower left hand corner where the ground cable goes to. Do this if you have not done this already. The instructions provided with the Timestep PSU does not have the DC ground wire located at the optimum area. This is well documented elsewhere on this forum.
The BBP package will come with 3 spacers and screws which may be brass coloured. These spacers are necessary to use since the PCB will be elevated from the taps. Place these spacers between the taps and screw the PCB with the longer screws provided by Mike New.
Now screw the black bolts back into the circuitry where the Bearing is. You should be able to screw the bolts all the way so that they are flush with the stator ring. Connect all electrical wiring back to the circuit board.
Last edited by CableMaker1; 26-08-2011 at 01:31.
Anyone who thinks CDs sound better needs to listen to my system. Besides, my cables sound better than yours.
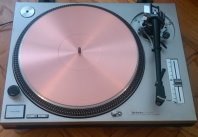
Technics SL1200-MK2 SE-1: MN Bearing + Baseplate + AL/CU Platter, Paul Hynes SR7 Power Supply, Isonoe Feet, SME V, Audio Technica AT33EV, CableMaker 1 Tonearm Cable
Technics SL1200-MK2 SE-2: MN Bearing + Baseplate, Copper Mat, Paul Hynes SR7 Power Supply, Isonoe Feet, SME 309, Audio Technica ATOC9/MLII, CableMaker 1 Tonearm Cable





 Reply With Quote