Now remove the cavity from the chassis. Where you left drill-marks is where you want to drill. You will need the 5 and 10mm drill-bits for this step. Note that in this step, if you have a bubble level avaiable on your drill bit and you are using a manual-drill like I did (as opposed to using not a drill plunger), make use of it to try to keep the drill steady!!! It is important to keep the drill level as best as possible since allignment, although it is not critical, is important since the holes need to be alligned well for the nut to clear when you attach the cavity back to the chassis.
I recommend that if you did not drill through the cavity when it was attached to the chassis, take the 5mm drill bit and drill until it goes through. Then take the 10mm drill and drill through these same spots making it bigger. Resist using only the 10mm bit to drill through the cavity if you did not drill through using the 5mm bit. Using just the 10mm drill to drill through all the way will take more time to drill through.
Dont worry if there are only 4 spots to drill into the cavity. The 5th screw may not have moulding around its area as it was in my case - the unmoulded area is the Transformer Area.
Last edited by CableMaker1; 26-08-2011 at 00:18.
Anyone who thinks CDs sound better needs to listen to my system. Besides, my cables sound better than yours.
Technics SL1200-MK2 SE-1: MN Bearing + Baseplate + AL/CU Platter, Paul Hynes SR7 Power Supply, Isonoe Feet, SME V, Audio Technica AT33EV, CableMaker 1 Tonearm Cable
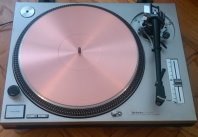
Technics SL1200-MK2 SE-2: MN Bearing + Baseplate, Copper Mat, Paul Hynes SR7 Power Supply, Isonoe Feet, SME 309, Audio Technica ATOC9/MLII, CableMaker 1 Tonearm Cable





 Reply With Quote