Originally Posted by
JazzBones

HI Stephen/Worrasf,
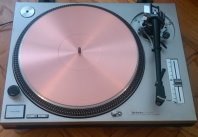
When I first replaced the stock bearing with the MN I just did a straight swap out. I preferred this to the stock bearing, the deck itself was brand virginal new. Must mention here that I was still using the stock platter with copper mat at the time, subsequently replaced by the MN Ali/Cu bonded platter still in use today

. At a later date I bought and installed the MN bearing base plate which Mike N had provided an additional three mounting holes so that the base plate could FIRST be bolted to the flange of the MN bearing and then this assembly secured to the chassis by five bolts as used by MartinT and Cable Maker on here I believe. After this had been accomplished the three new threaded screws (from MN) bolted both the bearing and B/plate down in the usual manner. MartinT had super Araldited his bearing assembly but as far as I am aware did not use the additional MN base plate to bearing flange bolts x 3 that I have used and mentioned herein. I completed this fixture by not using Araldite (if you go this adhesive route it is a permanent fixture as MartinT has outlined) but by using a breakable automotive gasket paste twix mating flanges of base plate and chassis pan this would allow me to disassemble the fixture if required. The KAB wax has interested me but will require the assembly I have achieved to be taken apart again... Herself would not welcome the idea of the dining room table been taken over again... she will never accept the fact that the said dining room table also doubles as my work bench!
Merry Xmas and 2014 everyone

PLEASE NOTE CAREFULLY!!! adding a MN bearing base plate requires accurate skill with drill and soft metal drill bits (MN instructs on these) and there is practically zilch leeway if you/anybody effs/stuffs this up!!! Skill/knowledge plus steady nerve is a requirement to do this fixture successfully but it has been done and I've probably over played this?
With all of MN's goodies and an recently final upgrade of outboard PSU I've come to journey's end with my 1210 and just sit back enjoy and marvel.
Somewhere on this forum CableMaker outlined his bearing plate assemble pictorially and our venerable Marco did so for me. Me and photobucket do notlike one another?
My detailed outline used to be a sticky until the site went through some reorganization by separating everything SL-1200 to the Techiepedia. Its been a couple of years since I was last active on this forum, so the one that I can say sticks out from no longer being a sticky with 100% certainty is my sticky. I believe the rewiring of internal to external PSU is also no longer a sticky, however I believe they should be reinstated as a sticky.
I will say this with certainty when I outlined my detailed approach to adding the MN Bearing Baseplate:
1. TAKE YOUR TIME!!! Any job that is worthy of doing will always need time devoted to that particular task for a job well done. Most forum members already know this, but it is always helpful to stress this point out, especially to new hobbyists.
2. REMOVE THE RUBBER BEFORE DRILLING!!! Don't take this shortcut by leaving it on!!! You will drill right through the surface into the cavity, and if you leave the rubber on, you will EASLY pierce through it before you know it.
3. Make certain you have a steady hand when drilling (if you have manual tools like me), AND that you drill onto an even surface. I used a garbage can made of plastic to hold the turntable up onto something when I did the project to both turntables. I don't recommend doing this on the floor since the turntable may not even steady, and that you may drill right into your floor once you clear the cavity.
I did not bond the bearing or the baseplate to the turntable. I did however shave down the extrusion of the cylinders that holds the screws to house the MN Bearing. I believe shaving down the extrusions to an even surface of the TT base allows the bearing base plate to be married to the base of the TT more securely than leaving the extrusions as is. I leave that to each individual on how they would like to handle that recommendation.
CM1
Anyone who thinks CDs sound better needs to listen to my system. Besides, my cables sound better than yours.
Technics SL1200-MK2 SE-1: MN Bearing + Baseplate + AL/CU Platter, Paul Hynes SR7 Power Supply, Isonoe Feet, SME V, Audio Technica AT33EV, CableMaker 1 Tonearm Cable
Technics SL1200-MK2 SE-2: MN Bearing + Baseplate, Copper Mat, Paul Hynes SR7 Power Supply, Isonoe Feet, SME 309, Audio Technica ATOC9/MLII, CableMaker 1 Tonearm Cable



 Reply With Quote