+ Reply to Thread
Page 1 of 3 123 LastLast
Results 1 to 10 of 29

Thread: Technics SL-1400 mk2

  1. #1
    Join Date: Mar 2009

    Location: Cork, Ireland

    Posts: 652
    I'm Nathan.

    Default Technics SL-1400 mk2

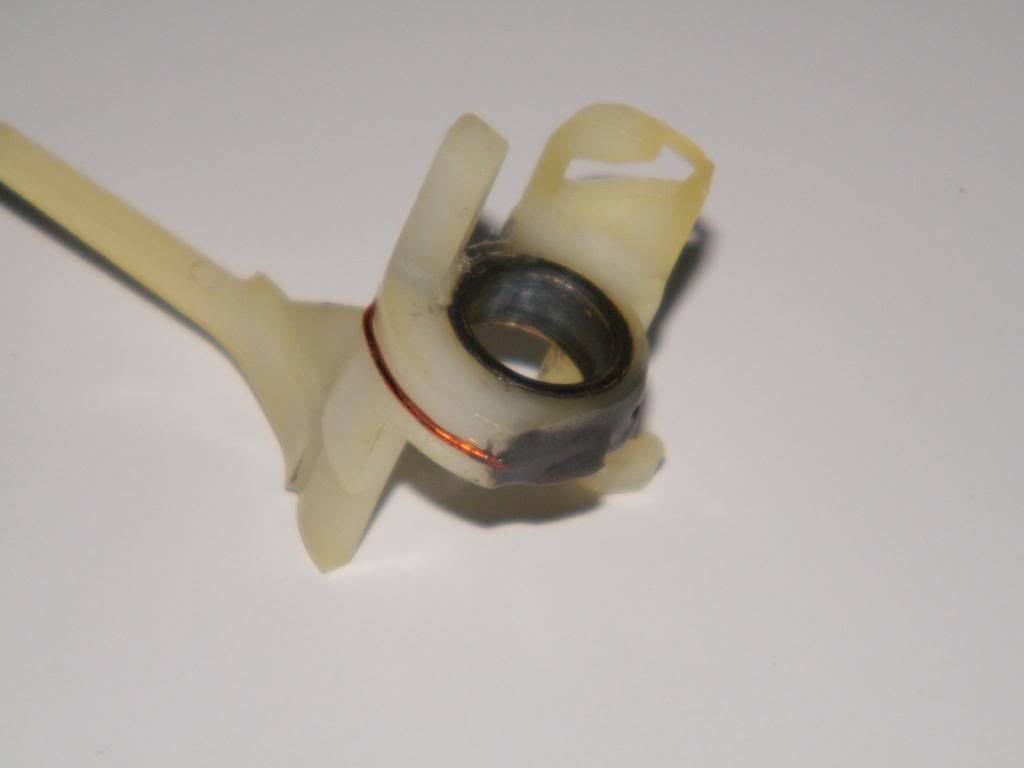
    Hey Folks, just got myself a 1210 , but have the opportunity to get my hands on a Technics SL-1400 mk2. Anybody got any impressions. The cueing lever is no longer functioning. Apparently this is common enough.

    I love the aesthetics of it.

    One thing I can't manage to get a pic of is the feet. Are they screw in feet like the 1210.
    DIY is fine and dandy, but just try selling it on!

    Nathan.

  2. #2
    Join Date: May 2008

    Location: A Strangely Isolated Place in Suffolk with Far Away Trains Passing By...

    Posts: 14,535
    I'm David.

    Default

    The under-tray was suspended IIRC and the cueing failure is common to almost all of this series with arm, as there's a nylon/delrin sleeve around the fixed under-pillar which splits. A PITA to strip the deck down to get at this part, which Technics haven't had available as a spare for twenty or more years now. There was someone offering a repair I believe..

    The best one of this series thirty five years later is te SL150mk2. The one you are considering is ok, but a bit full of itself sonically, so careful mat and siting choice is mandatory IMO.
    Tear down these walls; Cut the ties that held me
    Crying out at the top of my voice; Tell me now if you can hear me

  3. #3
    Join Date: Mar 2009

    Location: Cork, Ireland

    Posts: 652
    I'm Nathan.

    Default

    So that cueing problem is a bit more serious than I thought.

    Can the arm be swapped out as easy as it can with the 1210.
    DIY is fine and dandy, but just try selling it on!

    Nathan.

  4. #4
    Join Date: Mar 2009

    Location: Cork, Ireland

    Posts: 652
    I'm Nathan.

    Default Bit the bullet

    Well I bit the bullet and took a punt on the SL-1400 mkII.

    I picked it up from Dublin on my way down to Cork from the airport (spent two weeks in bournemouth/southbourne) and it looked in reasonable to good condition. When I got home I plugged it in and the TT played perfectly; the lovely LEDs lit up nicely and the speed was spot on. I just love how the table looks. First impressions were that the deck sounds a little bloated/less defined compared to the SL-1210, but still has great bass and hopefully with a bit of careful mat matching and new feet I can sort out my misgivings. The cueing mech is of course knackered. So I left her alone to get on and do a bit of research on how this can be rectified.

    Turns out the cueing mech problem is almost universal on these units, and a quick bit of googling reveals that the problem can be resolved by reconstructing a plastic cam contained in the arm. Next came a trip to vinyl engine and a quick download of the service manual so I knew how to properly take the deck apart. One thing the various posts on the net, regarding the repair of the cam, fail to mention is how deeply buried this cam is. DSJR mentions this in his post above, but I suppose I was just being optimistic. It took only a few minutes to pull apart the TT, but the arm took a lot longer. And, of course, Murphy's Law had to rear its head: I managed to strip the very final screw. So now I have to figure out how to get this thing out, and all repairs will be postponed till I can manage that.

    I've been taking pictures all the way through so I dont lose track of where things go. So once I get this screw out and the cam repaired, I'll start posting the pics.

    Lets hope I get this stubborn screw out. Might have to buy myself a dremel.

    The plan is to concentrate on repairing the cueing mechanism, which should reinstate the semi auto return function also. When I have confirmed that works as it should I may then go back inside and rewire the tone arm. Thing is the arm has a muting function, which means the wiring is a bit more complicated than it might otherwise be. The muting function kicks in based on the position of the arm, i.e., when the VTA comes above a certain level. I suppose I could remove the the muting function and simplify the wiring.

    Any comments or suggestions are welcome.

    Nathan
    DIY is fine and dandy, but just try selling it on!

    Nathan.

  5. #5
    Join Date: Mar 2009

    Location: Cork, Ireland

    Posts: 652
    I'm Nathan.

    Default Story so far...

    So I finally managed to get that screw out that refused to budge, and I thought I would post some pics of what I've done so far:

    First of all I totally disassembled the deck as per the service manual, and then moved onto the arm where the pesky cam lives:


    This pic shows the arm with a couple of items removed and the board to which the internal tonearm wire connects ready to come off.

    Here is the muting mech that I mentioned, which complicates the tonearm wiring a bit:


    Down to the last stubborn screw:


    I had to borrow the father-in-law's screw removers to finally get that last screw out.

    Once this was gone I could lift off that last plate and get hold of the cam that was causing the problem:


    You can see the split in the cam, which was caused by the plastic shrinking over time around the brass innards causing it to split.

    I tried using some JB Weld to fix this as some folks have reported on, but this didnt really work. I have another plan in the works which involves a visit to a friend of mine who runs a jewellers. More on this later.

    Meanwhile I started on the internal rewire of the tonearm, mainly prompted by my snapping one of the existing internal wires.


    A picture just to remind myself where the wires went. I have a very short memory span.

    By first attaching the new cardas wiring to the existing wiring I pulled the new wiring through the arm:


    And out the other side:


    As the existing wire was not soldered in place but attached using cartridge clips, so I decided to raid my vault of parts and use another set to attach the new wire:


    Next was the step of unsoldering the old wire from the board:


    I have yet to solder the new stuff in place. I am waiting to have the cam in place and functioning first.

    So I moved onto the external wiring:


    The SL-1400 has a nice method of strain relief on the external wire, but which meant I had to use a thinner cable than I had intended. I ended up using some mogami balanced mic cable plus some vampire connectors which will do the job nicely. I didnt manage to take a photo of these in place as yet.

    More to come. Lets hope the visit to the jewellers and availing of his tools helps my plight.
    DIY is fine and dandy, but just try selling it on!

    Nathan.

  6. #6
    Join Date: May 2008

    Location: A Strangely Isolated Place in Suffolk with Far Away Trains Passing By...

    Posts: 14,535
    I'm David.

    Default

    Good luck - I did warn you didn't I?

    The bloated bass is almost certainly a mat and siting issue and possibly the headshell, although at the time I never managed to do these sort of comparisons. Getting the exit lead to amp changed will certainly clean things up and as you've also done the internal wires too......

    Good luck with the mat and so-on. I don't think the platter is too ringy (can't remember) on its own, so a cork/acrylic fleabay mat or dearer Funk-type mat may be just the ticket for this deck. I also can't remember if the arm on these had the lower mass tube of the 1210 models, but if it has, you should be able to use the AT120e and similar more delicate Nagaoka's safely enough, as well as things like the Shure 97XE.

    I'm sure it's somehow possible to staple or splice this split part somehow, but I wasn't able to come up with anything and my mate just used his as a manual deck from then on.
    Tear down these walls; Cut the ties that held me
    Crying out at the top of my voice; Tell me now if you can hear me

  7. #7
    Join Date: Apr 2011

    Location: Northamptonshire

    Posts: 185
    I'm Angus.

    Default re: SL1400 Mk2

    Hello Rocha,
    The key to fixing the cam is to use a wire binding first, then epoxy.

    Here's one I did last month:


    I've got a spare repaired one - if you want to send me yours, I'll send you the repaired one in exchange.

    The reason that they break is because of the original assembly method. There is a groove in the circumference of the bearing bush (the grey part), and the cam has a ridge moulded into it so that when the cam is forced over the bush the ridge snaps into the groove giving a nicely assembled pre-ordained failure.

    regards

    Angus

  8. #8
    Join Date: Mar 2009

    Location: Cork, Ireland

    Posts: 652
    I'm Nathan.

    Default

    Thanks Dave,

    Yes, the cam is a bit of a problem. I think I am going to try using a cable tie. I found some nice small ones that are very strong. My plan is to file down a little trench all the way around the cam the same width as the cable tie, so the cable tie can sit in nice and secure and so it will not be too proud of the cam surface. Get the cable tie nice and tight and all should be well. It was working fine without filing the came surface, but it did slightly touch the base of the arm, which you dont want. The little trench should eliminate this.

    Also it looks like I might have to redrill the internal hole to take it back up to the full ten mm required for the brass thingy it turns on.

    I'd run out of space in my office to work on this, so put the arm pieces on a tray and took them into the kitchen to work on the arm there, and my wife walked in and immediately said: "Its funny the weird things you boys find fun". I had to admit she was right.
    DIY is fine and dandy, but just try selling it on!

    Nathan.

  9. #9
    Join Date: Mar 2009

    Location: Cork, Ireland

    Posts: 652
    I'm Nathan.

    Default

    Quote Originally Posted by phonomac View Post
    Hello Rocha,
    The key to fixing the cam is to use a wire binding first, then epoxy.

    Here's one I did last month:


    I've got a spare repaired one - if you want to send me yours, I'll send you the repaired one in exchange.

    The reason that they break is because of the original assembly method. There is a groove in the circumference of the bearing bush (the grey part), and the cam has a ridge moulded into it so that when the cam is forced over the bush the ridge snaps into the groove giving a nicely assembled pre-ordained failure.

    regards

    Angus
    Wow that looks great, and is it holding for you. I used the epoxy and it just fell apart on me. What do you think of my idea with the cable tie?

    I thought of using wire and tried it with a straighened paper clip, but I failed to get the thing to wrap properly.
    DIY is fine and dandy, but just try selling it on!

    Nathan.

  10. #10
    Join Date: Apr 2011

    Location: Northamptonshire

    Posts: 185
    I'm Angus.

    Default re: Technics SL1400 Mk2

    Hello Rocha,
    Yes it is holding fine - I have done several now and they are all working fine.

    What you don't see in the photo is that the cam is drilled through in the two thickest parts and the wire is fed through the holes and the ends twisted to both tension and fasten the wire. The tension in the wire ensures that the cam seats on the bush. Then it's all coated with JB-Weld.

    You need to use malleable wire so that you can twist the ends and tension it. I used 0.022" enamelled copper (can't remember the gauge) and a 0.023" drill.

    I think I would not want to file a groove the size of even a small cable tie around the cam - it's thin enough already.

    regards

    Angus

+ Reply to Thread
Page 1 of 3 123 LastLast

Posting Permissions

  • You may not post new threads
  • You may not post replies
  • You may not post attachments
  • You may not edit your posts
  •