Built up one of these Audiomods Rega RB250 Arm Kits
http://www.audiomods.co.uk/ contact Jeff Spall, who is very helpfull and a pleasure to deal with.
BTW I have a OL RB 250 which I was going to use as a doner arm but Jeff sells the only bits yu really need from the stock arm for about £30 so its not even worth scrapping an arm just sell it on ebay as you wont need it when you hear this arm completed
OK this is what I got in the kit, everything is supplied in a shoe box with your name and serial number on it plus a set of assembly instruction
http://www.flickr.com/photos/6950892...n/photostream/
http://www.flickr.com/photos/6950892...n/photostream/
All the parts are clearly marked - example http://www.flickr.com/photos/6950892...n/photostream/
The arm supplied in the kits is the ne 251 arm tube which is thicker than the 250 tube.
Building it up
read the instructions first not last
Start by polishing the arm tube, my arm came stripped of black paint, they still have some casting flashings on them so use a small fine file to dress them down then I started by rubbing down with 400 wet and dry, then 800, then 1000 wet.
Then I put a polishing mop in a drill and covered the outer edge of it with Autosol alloy polishing paste
http://www.flickr.com/photos/6950892...n/photostream/
once you are happy with the finish on the arm you need to drill the holes in the tube, a template is supplied to wrap around the tube the just drill through with the correct size holes in each location
http://www.flickr.com/photos/6950892...n/photostream/
After drilling is complete you will have to polish the arm again as you get slight raised edges when you are drilling.
http://www.flickr.com/photos/6950892...n/photostream/
I gave the internal a thorough cleaning after this as you don’t want any grit or swarf near your bearings.
next job is to insert the 2 internal arm stiffeners, you have to make up a tool to insert them so I just used threaded bar nuts and a washer so you can push them down square, give them a little tap to secure them in position but don’t go mad or you could split the arm tube.
http://www.flickr.com/photos/6950892...n/photostream/
Next job is to insert the bearing assay, I used sockets as advised in the instructions and it worked a treat, make sure you get the orientation of the counterweight hole in the correct osition as you cant rotate it once its pushed in but you can push it back out again and realign if necessary. Once you are happy screw in the counter weight stub and install the arm lift assay as its easier at this stage
http://www.flickr.com/photos/6950892...n/photostream/
Next job is threading the wiring loom through the tube, just use the fishing wire supplied and I used a bit of shrink tube to join them together to pull the wires through.
The little earth wire is tricky to get into position its also litz wire so you have to strip off the outer coating to get it to take solder.
The solder tags on the cardas wire are also lacquered and are very delicate so are difficult to strip and solder
http://www.flickr.com/photos/6950892...n/photostream/
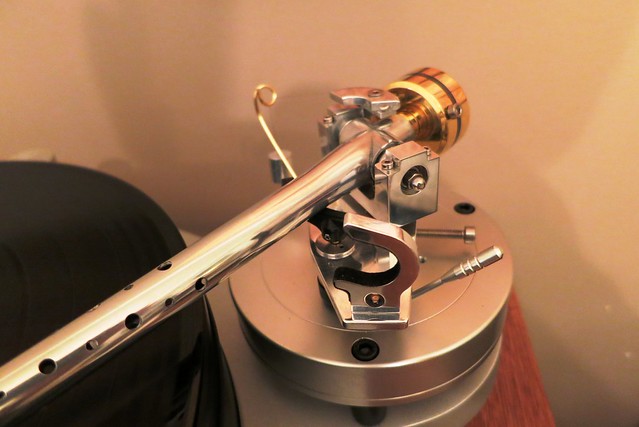
Then bolt the arm tube into the arm pillar, dot mix up the bearing caps and only fasten the Allen bolts finger tight no need for any more.
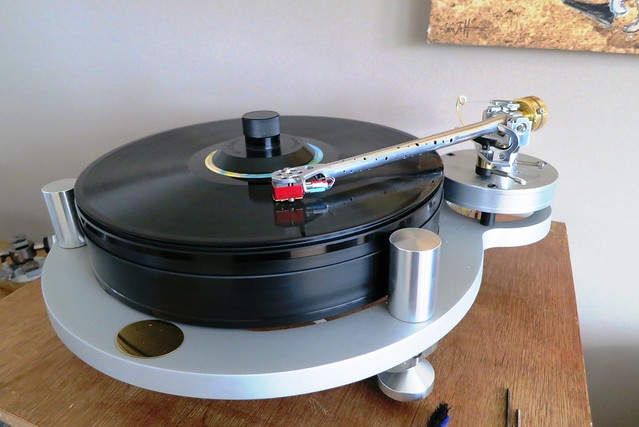
Then install the ant skate assay and counterweight and you are ready to install it on your turntable and complete the final alignment checks
http://www.flickr.com/photos/6950892...n/photostream/
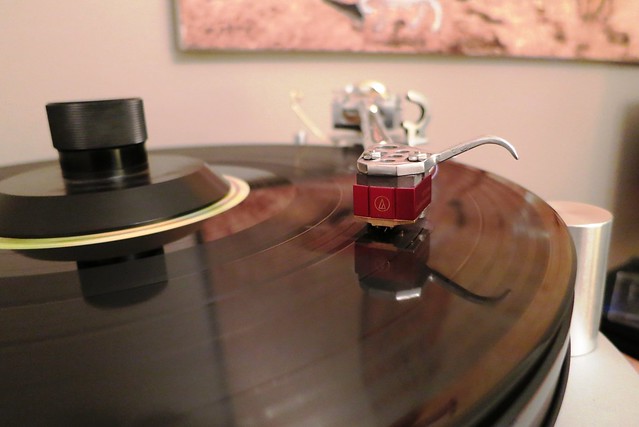
Install your cartridge and align as normal and fit the stylus guard, balance out the arm so you can check that the bearings are free, a gentle tap when they are floating should send the arm up and down then check sideways movement to check the bearings are not restricted in any way
All photos http://www.flickr.com/photos/6950892...h/10560250185/
Basically then your done so put on some records and enjoy.
http://www.flickr.com/photos/6950892...n/photostream/
http://www.flickr.com/photos/6950892...n/photostream/
http://www.flickr.com/photos/6950892...n/photostream/
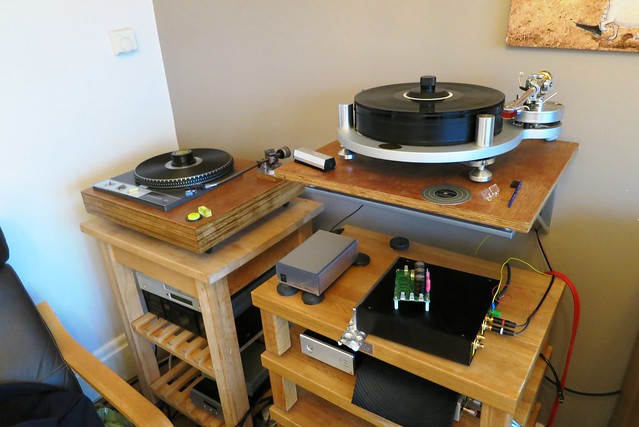
Now I know why they refer to the RB300 as Grey sounding this RB 250 Kit really opens it up, sounds more detailed and dynamic with much better bass IMO
I am very pleased with this arm its a bargain I think for the performance gain over the commercial arm.
Before fitting this arm to my Gyro deck the rb300 sounded pretty bland compared to my Garrard 401/Jelco/ Ortofon Kontrapunkt B but with this arm the gyrodeck / Audiomods giveds the 401 a good run for its money which is no mean feat
Alan


 Reply With Quote
 .
.